Today we are discussing a filthy topic: DIY RV detailing (sorry, if you thought you were getting something a bit more risqué).
There are a few good reasons why you would want to skip professional RV detailing and clean your RV on your own:
(a) Save money;
(b) Satisfaction of doing the job yourself, and;
(c) You lost a bet.

Whatever your reason, you’ve luckily stumbled upon the most comprehensive article on the web on how to DIY detail your self-contained RV, camper or travel trailer. In this article, we’ll cover:
- What to consider before you begin RV detailing;
- Step-by-step RV detailing routine;
- How to choose the right RV detailing products for your model;
- The pros and cons of “Eco-Friendly” cleaning products.
Ready to get your clean on? Let’s do this!
★ Please note that BeginRV may earn a small commission from any product you purchase from this article. All products recommended have been used in our travels and/or carefully researched ★
Before You Begin RV Detailing
How you go about detailing your RV depends on a number of factors such as:
- How you like to clean
- How much time you have to clean
- Your location, and;
- Your cleaning needs.
Here are a few things you should consider before you jump in:
Location
If you’re washing your RV at home – with your own water – you should be set to go so long as you have a water source. However, do be mindful that RV detailing can can require up to 100 gallons of water per wash.
If you’re staying at a campground, check with the campground manager ahead of time to see if they allow RV detailing on-site. Many campgrounds do not permit RV washing on site .
EXPERT TIP: Some substances – like bugs, bird droppings, tree sap, road tar, acid rain, road salt, etc. – take an extra toll on the exterior of your RV. You’ll want to wash your RV soon after encountering these. Don’t let these things sit. A good wax coating helps protect against these substances.
If you are not permitted to do your RV wash at a campground, you’ll need to move your RV to a location that allows water washing, or go with a waterless wash product like the Aero Cosmetics Waterless RV Wash.
- Faster, safer, easier waterless washing and waxing system --no ladder to climb.
- Makers of the 1st waterless aircraft & RV wash now introduce the 1st waterless tool, the Wash Wax Mop.
- Wash anywhere --no restrictions specifically designed for waterless washing & waxing of large vehicles, patented two-sided design --one WET & one DRY. Now you can waterless wash & wax with the reach...
- Highly performance Aircraft Quality Wax for your Car, Boat, and RV. ONCE YOU SEE THE DIFFERENCE YOU WILL NEVER USE AUTOMOTIVE PRODUCTS AGAIN! Used by Air Force One, Marine One, NASA, The Military,...
- ⚠️ Note: Understand that this is a Wash and Wax Product. Wax will protect and enhance the shine you currently have. If you have dull, oxidized, or scratched finish you will need a Polish to...
The Weather
Unless you have a nice roomy bay, expect to wash your RV outdoors. Some surfaces (aluminum siding, for example) will get damaged if you wash or treat them on a super-hot day.
EXPERT TIP: Park your RV or camper in the shade to wash it. This will keep the products you use from drying up too quickly and prevent unnecessary work.
So long as the weather is not in the triple digits or it’s about to storm, any day you can comfortably work in should be fine.
DIY RV Detailing: Steps and Tips
Where you decide to start is entirely up to you. Many owners like to start with the outside and work their way to the inside, so that’s where we’ll start.
Exterior Detailing
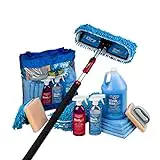
Be prepared for RV cleaning with the follow equipment:
- Long hose with a spray nozzle;
- Cleaning mitts, terry cloth rags, and/or an adjustable mop pole;
- A five-gallon bucket or soap dispenser nozzle attachment;
- Microfiber towels;
- An approved RV wash solution or mild detergent;
- A window cleaning solution and spray bottle;
- An appropriate RV wax;
- A tire cleaning solution and tire shine product
★ THE GOLDEN RULE OF RV DETAILING★
NEVER TAKE YOUR RV TO A REGULAR CAR WASH!
The harsh chemicals and powerful sprayers can strip the protective coatings on your RV’s siding. Washing and waxing by hand is always the best choice. If you can’t do it yourself, have a professional RV detailer do it for you.
Step One: Spray

With your hose spray nozzle on a gentle setting, thoroughly rinse down your entire RV to loosen up dirt and surface debris. If you are itching to get started, you can apply an environmentally-friendly washer concentrate to help further loosen the build-up on your RV.

- Cleans a wide variety of surfaces such as wood, composite, vinyl, metal, fabric, plastic, wicker, concrete, stone, brick and asphalt
- Lifts dirt, grime and stains from mold, mildew, Moss and algae
- Uses the power of peroxide to lift grime without harsh chemicals
- Product container may vary from image shown
Step Two: The Roof
Mix up your roof wash solution in either a 5-gallon bucket (if washing by hand), or a soap dispenser attached to your hose. The type of solution will depend on your roofing material.
Metal: Unpainted metal roofs will corrode if not handled properly. Use a soft sponge or cloth-like material and a gentle cleaning solution. Abrasive scrubber pads and harsh cleaners will scratch the surface. A pre-wash will help loosen the worst of the scum and dirt.
Fiberglass: Fiberglass usually has a gel coat that protects the material from UV radiation and other damage. Again, a mild soap is necessary to prevent stripping of this special coat.
An all-in-one wash + wax product is a good way to both clean and apply an extra layer of protection to fiberglass roofs. Some products may be sprayed on, otherwise, they are easy enough to apply by hand.
Rubber: Is your rubber roof EPDM (Ethylene Propylene Diene Monomer) or TPO (Thermal Polyolefin)? EPDM is less resistant to solvents and oil than TPO.
To avoid dissolving the membrane on the rubber, you should never wash with products that contain petroleum distillates, harsh chemicals, mineral oil, or citrus.
Painted Metal: By far the easiest material to clean. Any mild car-wash solution will do fine for this type of roof.
EXPERT TIP ★ Always wash from top to bottom ★ Wash the roof in 6’x6’ sections ★ Use this opportunity to inspect your roof and roof seals for cracks, dents, pinholes, mold, mildew, and other signs of damage or wear.
Step Three: The Body
Prepare your wash solution in a five-gallon bucket, or fill up your sprayer attachment. Before you apply the soap, hose down a section of your RV with clean water first.
Next, soap the section down and scrub it with a mop pole, sponge, or terry cloth wash rag. Most people like to start at the back and work towards the front.
After washing a section, immediately rinse with clean water. This prevents your solution from drying while washing the rest.
Once you’re done washing the entire body, you may want to give it another light rinse. Dry off the exterior with a fresh clean towel or mop head to avoid spotting.
EXPERT TIP: Just like the roof, start at the top of the RV and work your way down ★ Wash in small sections – 5’x5’ is recommended. The same goes for waxing ★ Use a soft bristle brush to scrub away tough dirt and grim. Never use rough abrasive materials ★ Always reseal aluminum or unpainted metal siding after washing, or it WILL corrode!
After a wash, it’s always a good idea to give it a good waxing to restore shine and keep your exterior well protected from the elements. Waxes can be applied either by hand, sprayed-on, or rubbed in with a buffing wheel. Some come included with the wash solution.
We’ll address how to choose a good wash and wax product further down in this article.
Step Four: Headlights, Taillights, & Trim
After finishing the main wash and wax, shine up the headlights and taillights. Scratched or dull light coverings may need a buffing with a special product designed to safely remove them.

Wipe down the trim parts such as door and window seals. Many of these parts are made of rubber or vinyl, and could use a protective sealant to keep them from cracking or developing mildew.
EXPERT TIP: ★ When prepping trim for sealant, clean the trim until no more debris comes off on your towel. This way, the sealant has something to cling to, and will not wash off with the next rain ★ Use this step to check for and repair damage to seals and trim ★ This is also a good time to wipe down the bumpers!
Step Five: Windows and Mirrors
It’s time to hit up the windows and mirrors on your RV. Some wash products do well to clean the glass while you wash the sides, but others may leave streaks or spots.
A microfiber towel and a spray bottle or a can of your favorite window cleaning solution will leave all your glass crystal clear in no time.
EXPERT TIP: ★ Don’t forget to wipe down the fixtures and backs of your side mirrors.★ This is a great time to replace old windshield wipers!
Step Six: Wheel Wells and Tires
Use a sprayer to free the dirt and tar from the insides of the wheel wells. Mild soap and a scrub brush will clean up all the grime sticking to your tires and mud flaps. After cleaning, you may choose to apply a specialized tire shine to give your RV that extra touch.
EXPERT TIP: ★ Replace worn-out mud flaps if necessary ★ Take this time to check tread depth and tire pressure ★ Inspect the walls of your tires. Waving or bumps indicate your tire is about to blow.
Step Seven: The Awning
The last item to address with your exterior is the awning. An efficient way to do this is to detach the legs and let it lay flat against the side of your RV or camper while you work on the top side.
Wet down the material first with clean water. Then – choosing a solution that’s safe for the fabric – scrub and wash from the top down. Then rinse well and repeat on the other side.
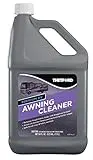
It’s a wise idea to have a spray handy that’s designed to protect the material from UV rays, fading, mold, and mildew. Apply this after you’re done washing and rinsing the awning. Some sprays require application to a dry awning – read the instructions thoroughly before applying.
Common Questions About Exterior RV Detailing
What About Waterless Washing?
As mentioned above, waterless wash products like Aero Cosmetics Waterless RV Wash Kit are a great option if you do not have access to an ample water source or you want to conserve as much water as possible. At the most, you might use one or two gallons of water for the entire process.
Many of these products include chemicals that provide a wax while you are washing – saving you time and doing double duty.
Is Dish Soap Safe to Use?
If dish soap is safe enough to use on newly hatched ducklings, it stands to reason it’s safe for use on an RV, right?
Well, that depends on who you ask. There is some controversy surrounding the use of dish soap. On the one hand, when used correctly it cleans most surfaces very well without stripping the gel coating off fiberglass or vinyl.
On the other hand, it does contain chemicals that are known in several states (mostly California) to cause environmental damage if not properly disposed of. It pays to err on the side of caution and do a quick internet search on local regulations before breaking out the dish soap.
Interior RV Detailing
Cleaning the interior of your RV or camper is a lot like spring cleaning a house, except in a smaller space. There are many ways to go about cleaning. How you do it is up to you, but here we will outline seven basic phases to the process that should cover everything you need to do for a thorough cleaning job.

This is also a great time to watch out for things that need repair and to take an inventory of your supplies. Jot these down on a notepad as you clean.
What You Will Need:
✓ Plenty of rags or paper towels
✓ A small vacuum for carpets and upholstery, with attachments
✓ Window cleaning solution
✓ Surface sanitizing spray or all-purpose cleaner
✓ Carpet and upholstery cleaner and/or stain remover
✓ Leather cleaning and reconditioning product for leather upholstery
✓ Armor-all type product for wiping down dashboards and cockpit surfaces
✓ Air freshener/deodorizer
✓ Toilet bowl cleaner and brush
✓ Pet stain remover and deodorizer – if you have pets
✓ Hardwood polish if you have natural wood furnishings
✓ A bucket or garden hose
✓ A step stool
EXPERT TIP: ★ Whether you are detailing your RV or trying to get to a hard-to-reach place, a RV Step Stool is a must have while you are out on the road. Get one with a large platform and sturdy, rubber grips to ensure your safety ★

- EASY IN & OUT RV: Folding adjustable step stool with full metal construction. The right step for children, elderly people to get in and out your RV, motorhome, trailers, truck, SUV . Very stable and...
- ADJUSTABLE & ADAPTABLE 3 levels of height: 17-23cm/7-9". Adjust gears, adapt to your usage habits
- SECURE YOUR SAFETY: With anti-slip pads for stability, DEPSUNNY's non-slip gripper strips design and non-slip rubber pads provide a secure step. Make sure users don't slip when stepping on this RV...
- STRONG, STABLE, WELL BUILT: Easily foldable aluminum platform pedals. It’s wide and deep enough , and the larger platform provides extra stability.It has higher weight capacity and can support up to...
- MULTI-PURPOSE:Fishing trips, reaching high shelves,If the folding stool is used somewhere else, DEPSUNNY still has your back.With other Scenes in mind, we wanted a design that allows for more than...
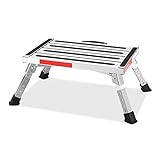
- DURABLE & ADJUSTABLE: The platform of the RV step is 17" X 12", the foldable ladder legs can be adjusted to four height settings . only 5.4LBS, the aluminum RV step stool can hold up to 1000 pounds.
- SAFETY UPGRADE: The surface of the RV step is covered with non-slip gripper strips, the thickened rubber feet have a strong gripping ability. Reflective strips on three sides make it visible at night.
- PORTABLE & EASY TO STORE: The folded RV stool is only 17" X 12" X 2.8", it needs only a small gap for storage. A portable handle is also provided on the side for convenient transportation.
- MULTI-PURPOSE: Adjustable aluminum RV step stool is suitable for a variety of places. Not only can it be used in an RV, SUV, but it can also be used in the home, kitchen as a height platform.
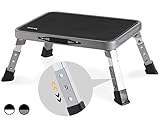
- 【Better Folding Step Stools for Adults】Double Elite folding step stools for adults are featured with height-adjustable design, perfect for your different height demands indoors/outdoors. The...
- 【Upgraded 3 Levels Adjustable Design】Unlike traditional one step stools with fixed height, Double Elite has upgraded the folding step stools for adults with 3-level adjustable heights, so to work...
- 【Safer & More Stable】Safety & stability are 2 main priorities for folding step stools. Double Elite sturdy heavy duty step stools for adults are with full frame made of quality thickened Alloy...
- 【Easy to Use】Pls follow image #6 demonstration to save your efforts. Came assembled so no installation needed. You can unfold/fold the foldable step stool easily, and adjust heights in 1 minute...
- 【Wide Application】The multi-use adjustable step stools for adults work well for different purposes & people. The height-adjustable RV step stool / SUV car step stool is specifically friendly to...
Phase One: Prep for Cleaning
Start with opening up all the windows and vents to get fresh air circulating through.
Next, take up all the trash and empty your cabinets, cupboards, and drawers. Throw out any supplies that are out of date.
This is a good time to make an inventory list of things you need to stock back up on.
Phase Two: Ceilings, Vents, and Window Screens
Just like working on the exterior of your RV, start high and end low. That way you’re not doing double duty when dust and grime fall to your countertops and floors.
Start by wiping down your ceilings. You may need the step stool for this. If you don’t want chemicals falling into your face as you spray, wet down a fresh cleaning rag and then wipe.
EXPERT TIP: Do you have thick tar stains from cigarette smoke? I’ve never had anything work better to remove tar than La’s Totally Awesome all-purpose cleaner. It’s concentrated, so you can control the cleaning power. If you do spray it directly on your ceilings, be sure to wear eye protection and a face mask.

- Prepare yourself to be AWEstruck by this 64oz All Purpose Cleaner.
- Multi purpose cleaner is Safe to use as a hardwood floor cleaner, tile cleaner, on countertops, walls and more, in the kitchen, bathroom, and other rooms throughout the house
- Need an All Purpose cleaner for your business machinery and furniture look no further just spray on and wipe off
- This versatile All Purpose Cleaner can also be used on Autos, RV and Boats
- No Acid, No Ammonia, No Bleach, Contains no phosphorus
Use a vacuum with a brush attachment to clean out the ceiling vents. While you’re at it, vacuum your RV air conditioner vent and filter, too.
This is also the best time to wipe down or gently vacuum the window screens since they tend to get quite dusty. If they’re particularly grungy, you can wash them with a very mild solution of warm water and dish soap.
Phase Three: Bedding, Upholstery, Drapes, and Curtains
Strip the sheets and blankets from the beds and hideaways. Don’t forget the pillowcases! Throw these in the wash and replace with fresh linens and blankets.

Take down the drapes and curtains. Wash if necessary, or take them outside and shake the dust free. I like to finish up my cleaning before I reinstall them. This makes it easier to get to the windows.
Remove any cushion covers that you can and gently wash them, or clean them off with a vacuum cleaner hose. If you decide to spot treat, or use a carpet cleaning product, make sure the product is gentle enough to not strip or damage any stain or mildew-resistant coating on these fabrics.
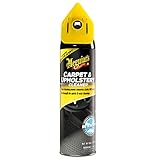
- DEEP CLEAN: deep cleaning, professional strength formula removes stains & odors
- REMOVE ODORS: Features Maguire's permanent odor eliminating technology*
- QUICK AND EASY: fast acting foam breaks down stains for quick & easy cleaning
- RESIDUE FREE: dries quickly without leaving behind a sticky residue
- NEW CAR SCENT: leaves behind a fresh, new car scent
Leather upholstery will need special treatment. I am hesitant to use anything other than water to clean leather, but there are products out there designed to both clean, condition, and restore the shine and suppleness of leather.
We recommend using a leather conditioner after cleaning, otherwise, the leather can dry out.
Phase Four: Cabinets, Countertops, Doors, and Drawers
Using your favorite all-purpose cleaner, it’s time to wipe down all of the surfaces in your RV starting with the countertops.
Never use bleach, hydrogen peroxide, or harsh chemicals on any of your surfaces as these substances can damage the integrity of the materials.

✓ Wipe down veneer cabinets with a soft cloth.
✓ Solutions designed to both clean and polish are best for wood surfaces.
✓ Use a mild cleaner or light dish soap solution for vinyl coatings. Pull out drawers and wipe the dust out from inside with a towel or vacuum with a narrow attachment that’ll reach into the corners.
✓ Dust off or vacuum any shelving. Then wipe down doors, door frames, and doorknobs.
Phase Five: The Kitchen
In the kitchen area, start by wiping or vacuuming out the insides of the cabinets, followed by a wipe down of the cabinet doors.
Take out the range hood filter and soak in warm soapy water. DO NOT scrub! Rinse gently and allow to dry completely before reinstalling.
While the range hood filter is soaking and drying, continue cleaning in and around the hood with an all-purpose cleaner. Wipe the wall behind the range, then follow up with the stovetop. You might need a mild degreaser to get rid of solid oil spots.
For burnt-on food, try soaking with hot water for a few minutes and use a plastic paint scraper to lever it off.
Tackle your appliances next. To clean out a grunky microwave, place a small bowl inside and heat for two minutes. This will loosen most of the grunk.
EXPERT TIP: A version of this trick that I picked up from the restaurant industry is to lay a wet towel over the glass and heat it up. Then I wipe out the inside with that same towel. BE CAREFUL if you do this, that cloth will be HOT! (I used thick latex or vinyl gloves to protect from the steam.)
I would then use this same towel to soak dried food substances out of my refrigerator, then rinse in hot clean water and wipe down the rest.
Last, rinse out and wipe down your sink, and your kitchen is done!
Phase Six: The Bathroom
I always save bathrooms for last (that is, right before getting to the floors). This prevents me from wiping bathroom germs all over the rest of the RV.
To be safe, avoid harsh cleaners in your RV’s bathroom. You also don’t want such products in your holding tank, either. Look for a product specifically made for your bathroom surfaces.

Start with the shower and the walls. Begin near the top, spray down the walls with clean water first to wash off hair and loose debris. Then spray down with your cleaner and wipe from top to bottom.
For greater efficiency, I use a large, worn-out bath towel. You can also use a hand-held squeegee and follow up with a microfiber cloth to get rid of streaks.
Next, rinse and spray down the shower curtain if you have one. Replace if it’s torn, discolored, or shows signs of mildew (red splotches or spotting). Wipe down the bathtub from the top edges and end at the drain.
I wipe up any hairs into my towel or rag, then give the rag a good flick outside to keep those hairs from magically reappearing in my bathroom.
Wipe down the sink. Then spray down the entire toilet, including the outside of the bowl and the base. Add the bowl cleaner and let it sit for last.
Wipe down the outside of the toilet first, ending with the seat, then the underside of the seat and the rim. Discard this rag immediately after that. Scrub out the bowl, and you’re done with everything in the bathroom, save the floors.
Phase Seven: Floors
Choose the right products for the type of flooring that you have. If you have carpets, you may want to have a spot-treatment solution on hand.
Use a very mild cleaning solvent that you can dilute so that you don’t leave behind a sticky film on your hard floors. Often, a capful of disinfecting floor cleaner in 3 gallons of water is all it takes. Scrub with a wet mop and go over it again with a “dry” (or well-squeezed out) mop. It should dry within minutes.

For carpets, vacuum well and treat with spot stain if necessary. This is why I prefer to do my hard floors first – while I’m working on those, the spot stain has time to loosen the carpet stains.
You might want to go the extra mile and wash your carpets with a Rug Doctor or carpet washer, then let the carpets air-dry. Otherwise, hit the carpets up with another good vacuum. (This is also a good time to dust or vacuum the baseboards and trim.)
EXPERT TIP: Do you get annoyed at how hairs stick to your floor despite your best efforts? Use a long-handled lint roller on your hard floors after you sweep to pick up every last eyelash.
Once you are done with the floors, your detailing is complete! Add an air freshener if you’d like a final touch.
Take a moment to appreciate the wonderful job you just did and pat yourself on the back. There’s nothing more rewarding than a fresh, clean RV!
How to Choose the Right Products
There are a lot of products out there on the market. How do you choose the correct one?
The first thing you’ll want to do is to refer to the manufacturer’s manual and read up on the types of materials that your RV’s interior is made of. It may also give some recommendations or tips for how to clean these surfaces and what type to use – or what not to use.

Chemicals to never use in your RV:
X Bleach
X Ammonia
X Hydrogen peroxide
Good RV cleaning chemicals:
★ Non-toxic
★ Approved for use in RVs
★ Non-abrasive
It helps to research products online. Products with a lot of customers giving mostly great reviews are generally good ones to go with. When looking at reviews, be sure to keep in mind if the reviewer used the product correctly. Many people do not and, as a result, leave bad reviews.
Reviews that go into great detail to point out both the pros and the cons of a product (and aren’t just hamming it up for the sake of beefing up good reviews), go a long way to help you decide if it is the right product for your needs.
To see our recommendations on a few tried-and-true RV detailing products, check out our article RV Detailing for Beginners (Your Questions Answered).
Eco-Friendly RV Detailing Products
Eco-friendly. Environmentally friendly. Earth-friendly. You’ve probably heard these terms tossed around when it comes to RV detailing chemicals. What does that mean?

In a nutshell, all these terms refer to the same thing: It does not harm the environment.
Sounds like something good to use, right? Well, almost. According to Good Housekeeping’s website, some companies take advantage of these words to produce sales, while the products themselves fail to live up to these claims.
Sometimes the products aren’t very effective in doing what they are meant to do. Read the labels to find out if an “eco-friendly” product is legit.
“Eco-friendly,” or “sustainable” products will:
★ List their ingredients (even though it is not required by law).
★ Will bear a seal from a legitimate environmental inspection organization.
★ Actually work as intended. (Look up consumer reviews.)
★ Come in minimal packaging or packaging that is 100% recyclable.
“Eco-Questionable” products will:
X Design their own “certification” logos.
X Will not describe how they are sustainable or “earth-friendly.”
X Have packaging that’s covered in elaborate graphics or isn’t 100% recyclable.
X Have bad reviews.
X Rarely list their ingredients.
If you want to be more environmentally conscious while detailing your RV, here are a few easy things you can do:
✓ Use a waterless wash kit for your exterior.
✓ Use vinegar and water for your light cleaning needs.
✓ Use baking soda as a natural deodorizer.
✓ Use ice cubes to clean your holding tank – the cubes break up grime as you drive.
✓ Use concentrated cleaning products, and use them sparingly. The less you buy, the less impact on the environment from the companies making the product.
✓ Spray cleaning solvents onto your rag. This makes your cleaner go farther and chemical particles aren’t launched into the air.
✓ Always dump dirty cleaning water down a proper drain where it can go through the sewer treatment system – never dump it onto the ground!
✓ Use re-washable towels instead of paper towels.
DIY RV Detailing: The Final Word
If you have the time, energy, and resources to detail your RV or camper yourself, you’ll find it a very rewarding experience.
Here is a quick review of our best tips for DIY detailing your RV or camper:
★ Park in the shade for detailing
★ Check that your campground allows on-site detailing
★ Review your RV’s user manual for cleaning recommendations
★ Always clean your RV from top to bottom
★ Use cleaners that are approved for use on your RV’s materials. NEVER use bleach or harsh chemicals
★ Use cleaning time to take note of repairs and needed supplies
★ Clean the bathroom last before you do the floors to prevent spreading germs
★ Always dispose of dirty wash water down a drain that leads to a septic or sewer system
★ Carefully research products you want to buy when they are labeled “eco-friendly”
★ No matter how you go about detailing your RV, be sure to have fun at it and stay safe!
Easy Travels,

Last update on 2023-09-13 / Affiliate links / Images from Amazon Product Advertising API
